Posts

Embed Tiny Editor in Your Web Application:

Image
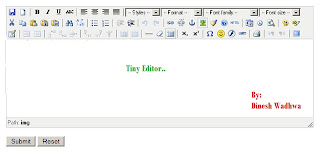
1 . First of all open your Web page in your application in which you want to embed the Editor. 2 . This editor is know as Tiny Editor which has nice features by which the user can enter his/her text in stylish way by embedding smileyes, embed photos. 3 . We can set font family, Font Size, Cut, Copy, Paste and many other functions are there by which the text can be represented in a better way. 4 . Now Steps to embed the Tiny Editor in you web page are: a : Drag and Drop Textbox and give id to id name RichTextBox. b : Set the Property of Textbox:-TextMode Property to Multiline. c : Drop one Label to page, we transfer the text from RichText Box to Label when we store the text to database. d : Put this Code in your Head Tag:   < script type ="text/javascript" src ="tinymce/jscripts/tiny_mce/tiny_mce.js"></ script > < script type ="text/javascript">    tinyMCE.init(     {         mode : "textareas...

The Page Life Cycle of an ASP.NET and its controls.

Image
The life cycle starts when a user requests a web page through his/her browser. The Web server than process the page through a sequence of steps before response is sent back to the user's browser. The steps are as: Page Request Start Page Initialization Load Validation PostBack Event Handling Render Unload Page Request The page request occurs before the page life cycle begins. When a user requests the page, ASP.NET determines whether the page needs to be parsed and compiled (therefore beginning the life of a page), or whether a cached version of the page can be sent in response without running the page. Start In the start step, page properties such as Request and Response are set. At this stage, the page also determines whether the request is a postback or a new request and sets the IsPostBack property. Additionally, during the start step, the page's UICulture property is set. Page Initialization During page initialization, controls on ...

Registration and Email Verification for New Accounts

In This Code i am Providing the code by which the user can easily registered to the Website and the E-Mail is sent to the user for the Verification. If the user will not verify his/her email,the account is not activated and that person cannot login. Here are the Following Steps to achieve that:- 1.Create new Web application and make one form in which the user can register and add the following code to the source code:       //Send email to user for verifying account         CreateUserWizard cuw = (CreateUserWizard)sender;         MembershipUser user = Membership.GetUser(cuw.UserName);         Guid userId = (Guid)user.ProviderUserKey;         System.Net.Mail.MailMessage EmailMsg = new          System.Net.Mail.MailMessage("info@ask.com",     ...

Adding Template Fields to a GridView Control.

A TemplateField is used in cases where authors need complete control over the contents of a GridView column. The TemplateField is declared with an <ItemTemplate> element, which in turn is used to define the content that will be rendered for each row in the column. The ItemTemplate can include any valid HTML. To add a template column:- 1.Set the GridView control's AutoGenerateColumns property to false . <asp:GridView id="myGrid" runat="server" autogeneratecolumns =false ... > 2. Within the GridView declaration, declare a <Columns> element. 3.Within the Columns element, define the <asp:TemplateField>   control, along with the required <ItemTemplate> element. 4.Within the ItemTemplate , define the HTML or server control that  will contain the field value. To display the value of a field in an item template, use DataBinding Expression Syntax .  5.Optionally set the <asp:TemplateField> control's  other propert...

Dynamic Gridview Bind

First You have to Drag Gridview Tool From your Toolbox and place it to your design .aspx Page:- Then at  the Code behind page in .cs file like Gridview.aspx.cs file call  the following function to your button_click event:- void BindData() { try { SqlConnection con = new SqlConnection(@"server=.\sqlexpress; database=TestDB;Integrated Security=SSPI;");   DataSet ds = new DataSet(); con.Open(); SqlDataAdapter da = new SqlDataAdapter("select id,name,flag  from EmpData", con);    da.Fill(ds); BoundField BC1 = new BoundField(); BC1.HeaderText = "ID"; BC1.DataField = "id"; GridView1.Columns.Add(BC1); BoundField BC2 = new BoundField(); BC2.HeaderText = "Name"; BC2.DataField = "name"; GridView1.Columns.Add(BC2);  GridView1.DataSource = ds; GridView1.DataBind(); con.Close(); } catch (Exception e) { Response.Write(e.Message.ToString()); con.Close(); } Enjoy  :-)

Create File Uploader (Visual Studio)

By this Coding you can create File Uploader  and the is file will uploaded into Foder:-    Design Source Code:-    < form id ="form1" runat ="server" > < asp:FileUpload id ="FileUploadControl" runat ="server" /> < asp:Button runat ="server" id ="UploadButton" text ="Upload"   onclick ="UploadButton_Click" /> < br />< br /> < asp:Label runat ="server" id ="StatusLabel" text ="Upload  status: " /> </ form > Coding C#: protected void UploadButton_Click( object sender, EventArgs e) { if (FileUploadControl.HasFile) { try { string filename = Path.GetFileName(FileUploadControl.FileName); FileUploadControl.SaveAs(Server.MapPath( " ~/Folderpath " ) + filename); StatusLabel.Text = " Upload status: File uploaded! " ; } catch (Exception ex) { StatusLabel.Text = " Upload stat...

Creating New Web Page in Asp.net

Creating New Web Page in Asp.net 1.Open your Visual Studio 2.0 or 3.5 version 2.Go to File Menu---->New------>Website 3.On the Templates,Select ASP.NET Website. 4.In this diolog box set ur Language as C#. 5.Click Ok and your Website gets open. 6.Start working with web pages...